For the first time ever, I have a 3d printer! Well, it’s not actually mine, but it’s on my desk - it’s mine to use (and abuse). I wanted to update the firmware on it, but was worried about bricking it. This blogpost is about the procedure I went through to update it to Marlin 1.1.9.
TL;DR: If you’re just interested in the steps, scroll down to ‘Updating the Firmware’.
Note: No guarantee is provided about the correctness of these steps. They worked for me, is all. Follow them at your own risk.
Background on the Anet A8
The Anet A8 is a relatively inexpensive 3d printer you can buy from e.g. Amazon (Note: affiliate link).
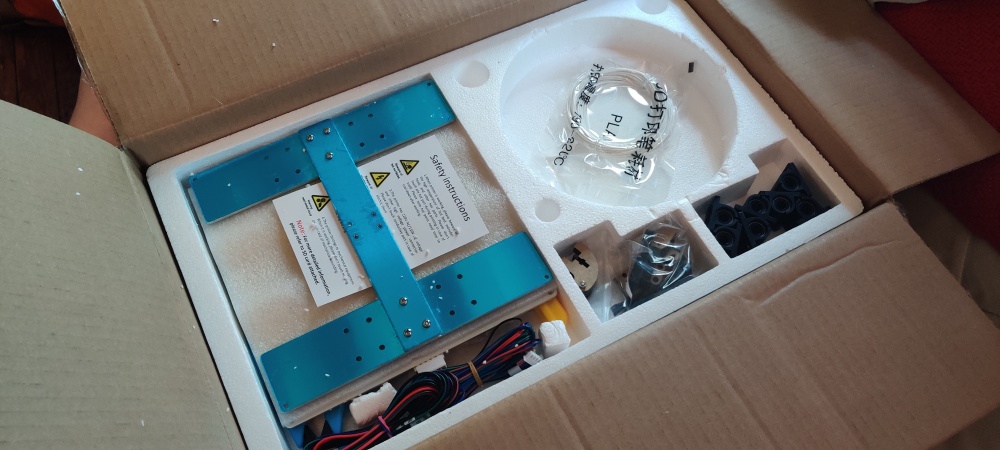
It comes as a Kitset, which I had great fun unboxing…
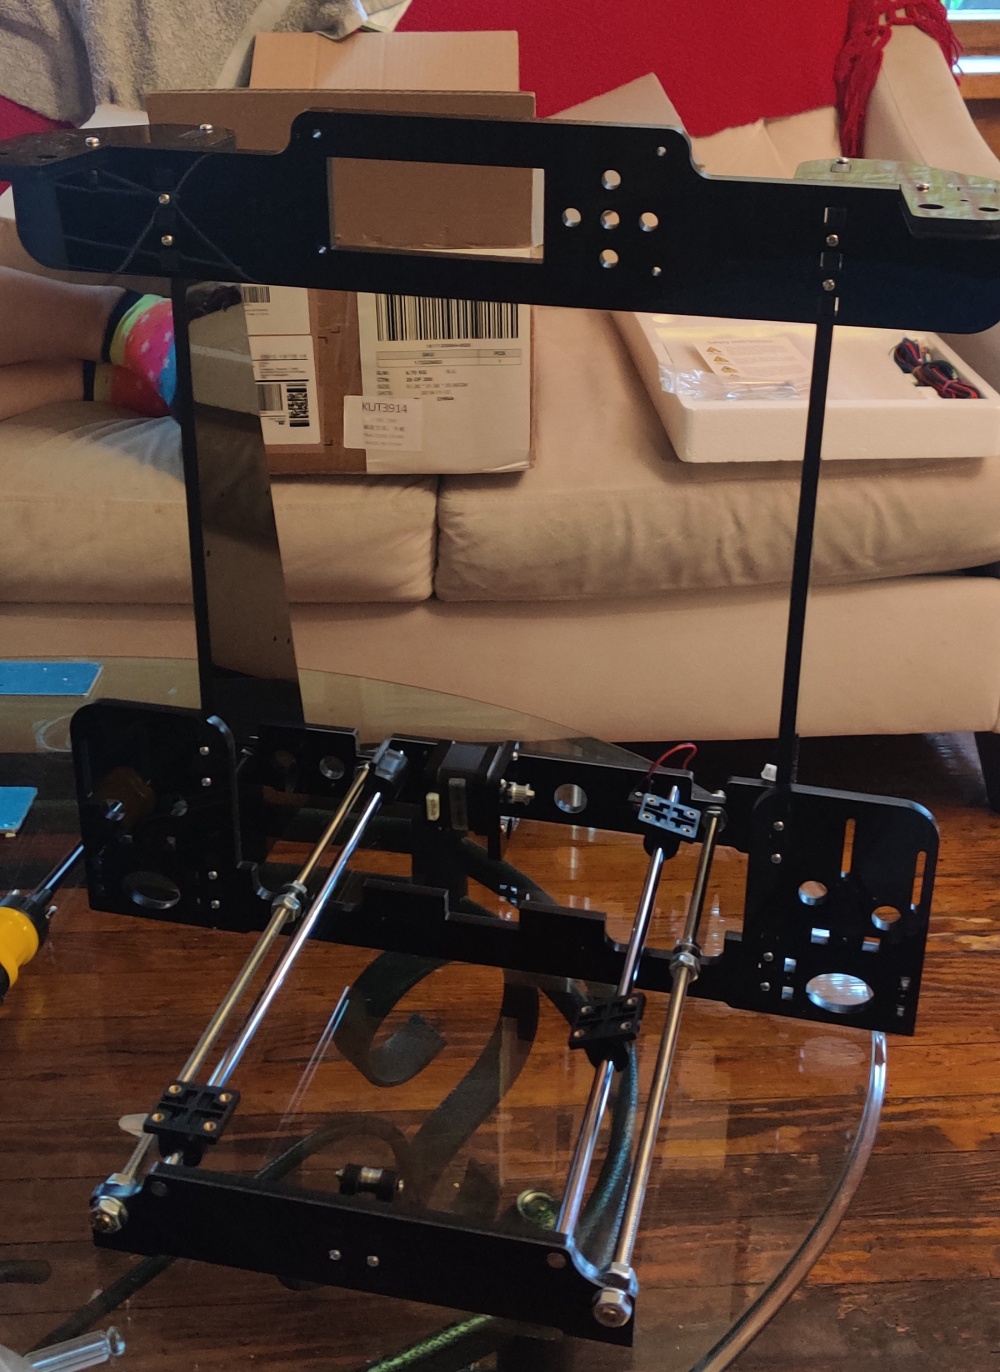
…and then assembling.

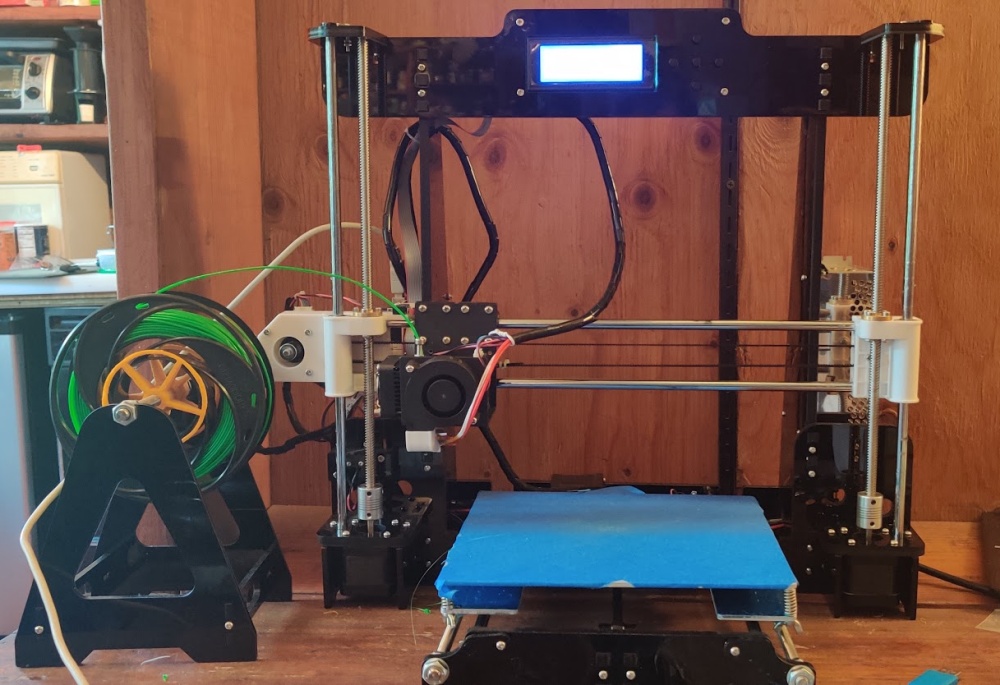
Once finished, it was pretty easy getting started on the first print,
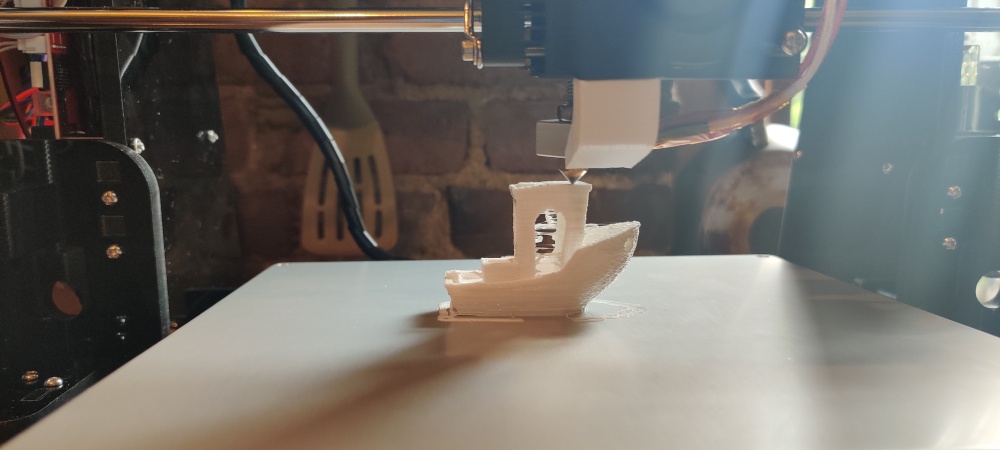
but it was pretty clear that I needed to calibrate it - just look at that stringing!
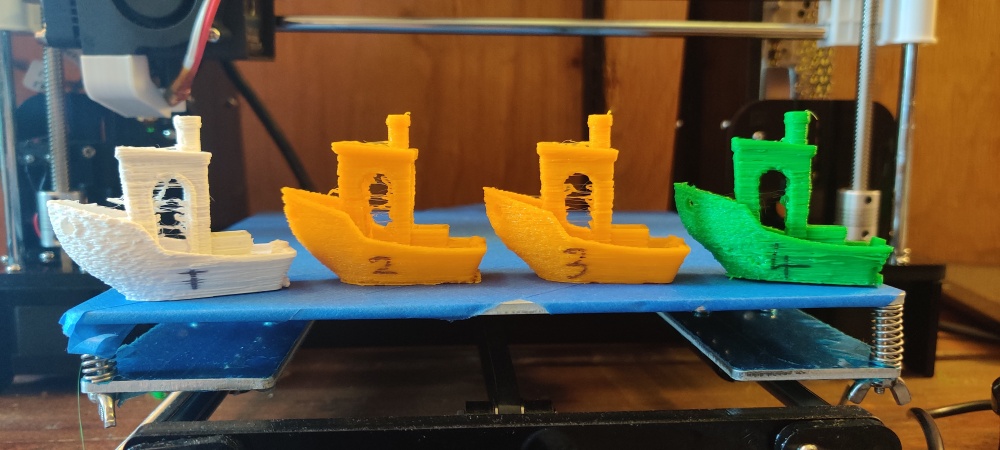
I spent a lot of time with the calibration guides provided with the printer, changing extrusion speed/distance, printer temperature, movement acceleration, and so forth, but I only ever seemed to improve the print quality a little. Well, until I had a go at updating the firmware that is. Then, with absolutely no changes to the gcode between print 3 and print 4 (and a different dye in the filament) I managed to get a significant improvement!
So many online resources
There are plenty of resources online regarding updating the firmware on an Anet A8 in 2020.
However, most of them leave open-ended questions around ‘does this work with the 1.7 revision of the board?’, or ‘is this Github still maintained in 2020?’
For instance, these are just a subset of the issues I found when checking the procedure would work:
- Problem with compilation
- More problems with compilation
- Yet more problems with compilation
- Issue: new firmware printing off center
- Problems with homing after updating
I started feeling the same way as DarkTerritory, here, who started a forum post in 2018 with “K so I’m thinking abut trying to upgrade my old Anet A8 motherboard to Marlin. I have been looking around on the intertubes and now I’m more confused than ever. Everyone uses a different flavor of Marlin and no one does the update in the same way. Many also seem to leave out important steps.”
In the end they did resolve their issue, but again left the steps largely as an exercise for the reader.
So, I decided to tackle this - here’s my walkthrough on updating the firmware on an Anet A8!
(Optional) First step: Backing up the original firmware
If you think you might ever want to restore the original firmware, (or you need to flash a new Arduino bootloader for some reason), or you’re like me and are deeply paranoid, then you might want to copy the original firmware from the printer to your computer before you get started.
To do this you’ll need an external programmer for the Anet A8’s mainboard. The easiest tool to use for this is the Usbasp, which is an inexpensive programmer you can buy from most online retailers (e.g. mine came from Amazon (Note: affiliate link)), and the 10-pin to 6-pin programming adapter it is commonly sold with.
Then, using a program called avrdude you can interact with the board through its programming port.
First, here’s how to connect it up. Orient the end of the 6-pin adapter so that you can see the MISO/SCK/RST lines.
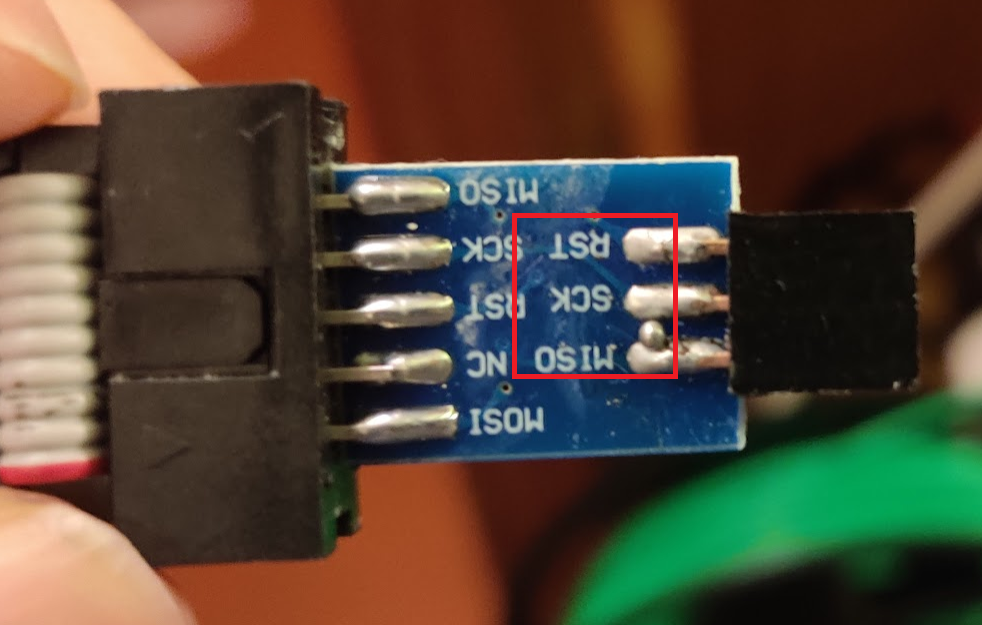
You need to know which way round the adapter is before you plug it in. The MISO/SCK/RST side is to face the other 10 pin socket which the programming port is connected to.
Here’s the complete pinout of the programming port:

And here’s the adapter when it’s plugged in in the correct orientation:
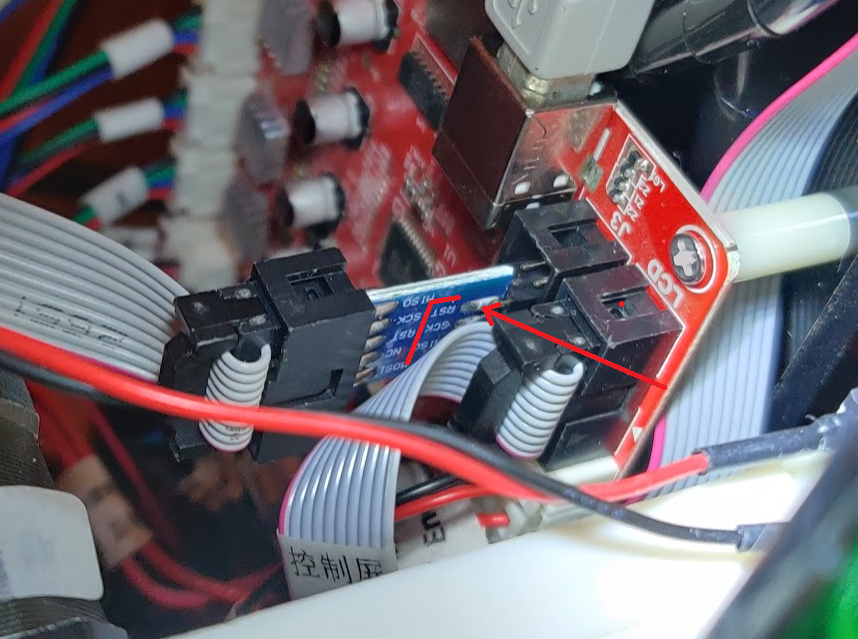
Before you plug it to your computer power up the printer as normal from the wall socket. Then connect the Usbasp to your computer via the USB port. Now that it’s plugged in, you can pull the existing firmware off as a binary.
On Windows, you can install and use Avrdudess, and then set yourself up to look a bit like this:
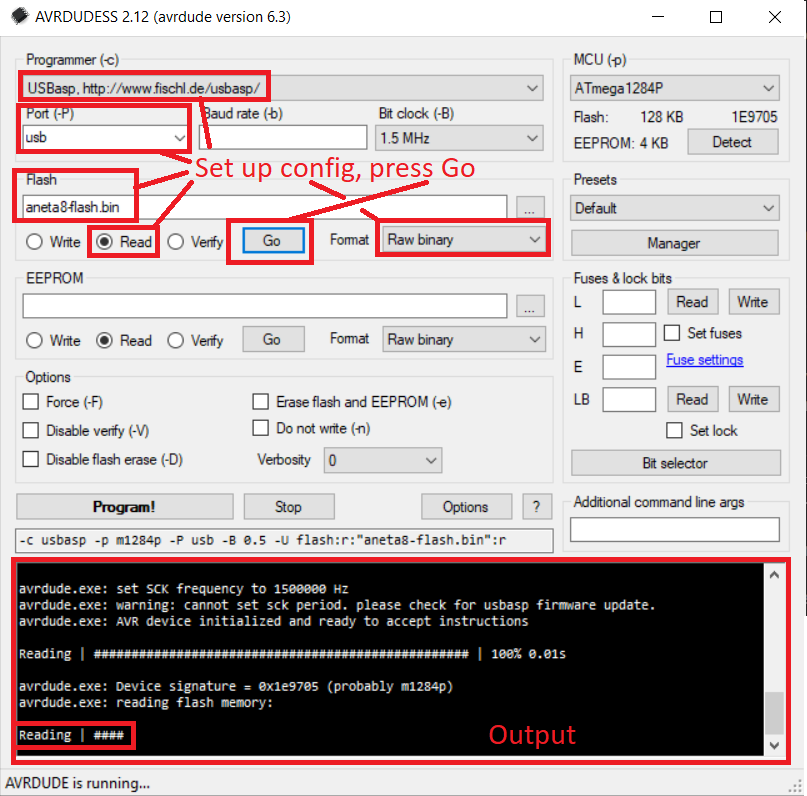
This will then back up the existing firmware to a file aneta8-flash.bin.
Alternatively, if you are using Ubuntu, you can back it up by running
sudo apt install gcc-avr avr-libc binutils-avr avrdude,- then
avrdude -c usbasp -p m1284p -U flash:r:aneta8-flash.bin:r
Which will do the same thing.
Updating the firmware to Marlin
Before we get started, note that on some Anet A8 boards you may need to burn a new bootloader. This is actually pretty easy, although I didn’t need to do it. Don’t worry if you find you do need to, you won’t hurt anything in discovering this. If these steps don’t work, just progress to the last section, ‘Burn a new bootloader using the Usbasp’.
Preliminaries
Firstly you need to install Arduino. Go do that first and then come back here.
Once you’ve done that, download the Marlin firmware from here.
Make sure it is the bugfix-1.1.x version as this is the most up to date version of the 1.1 firmware. It should look like this.
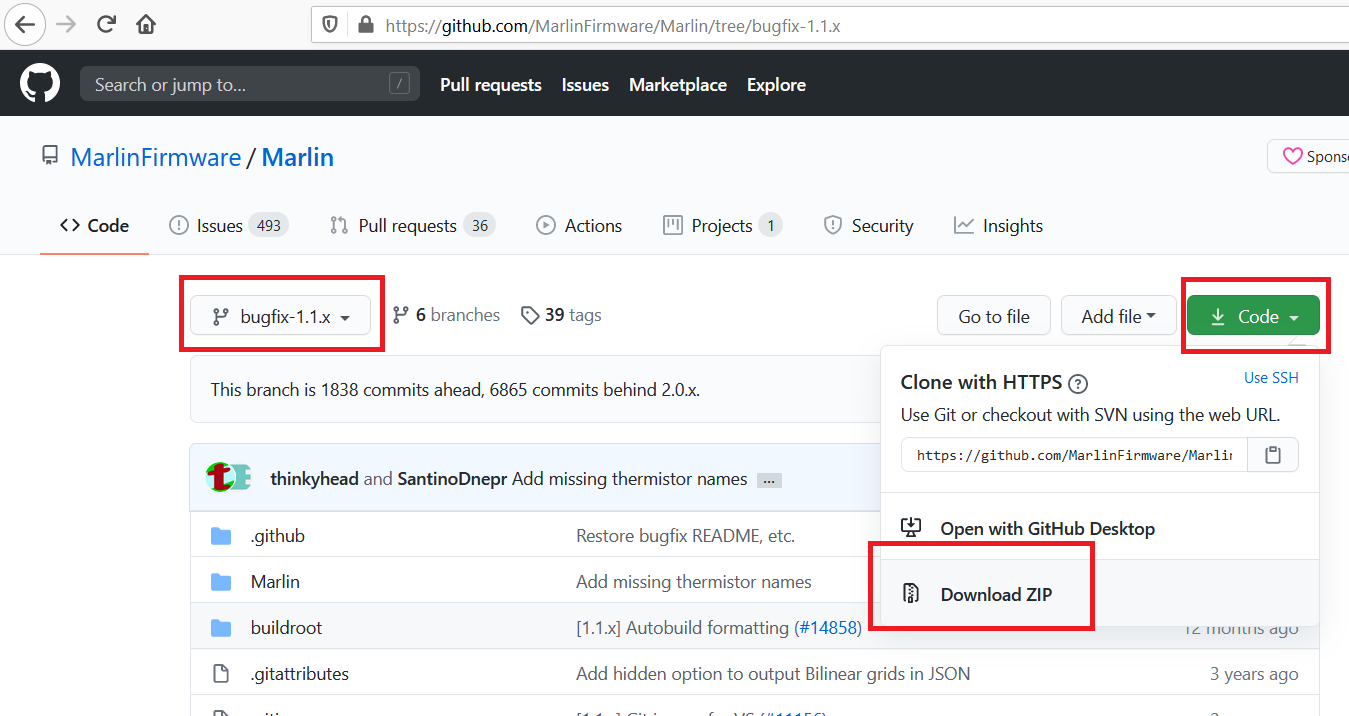
Press the code button and then download it as a zip. Unzip it.
Configuring Marlin
Now we need to apply the Anet A8 configuration.
Go into the example_configurations/Anet/A8 folder and copy the two files configuration.h and adv_configuration.h.
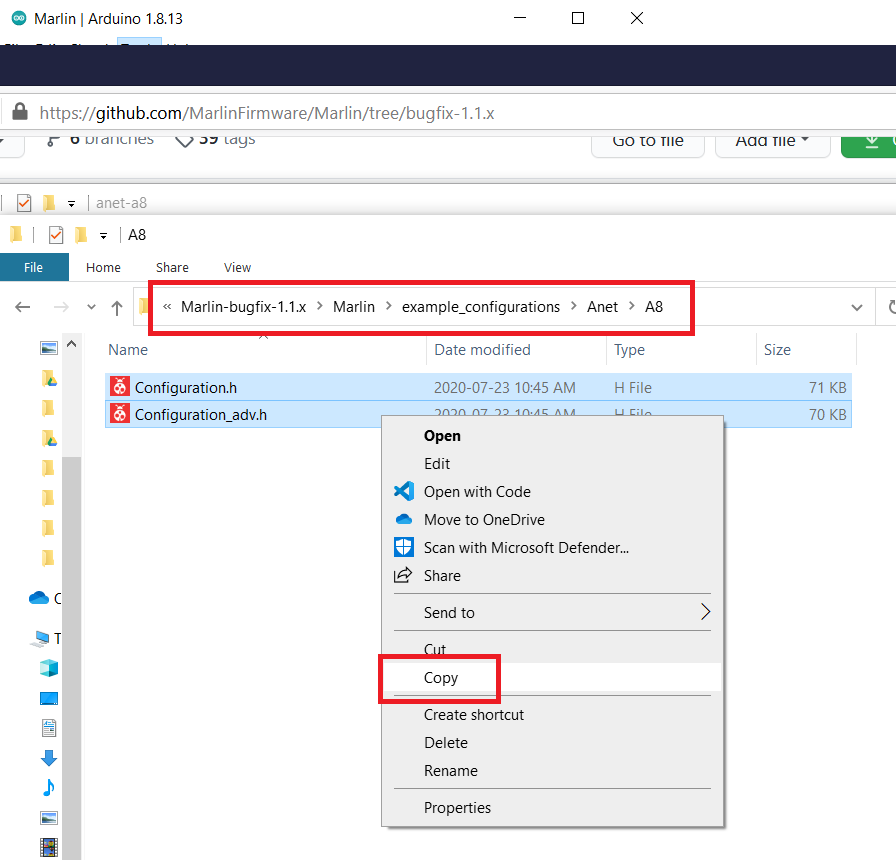
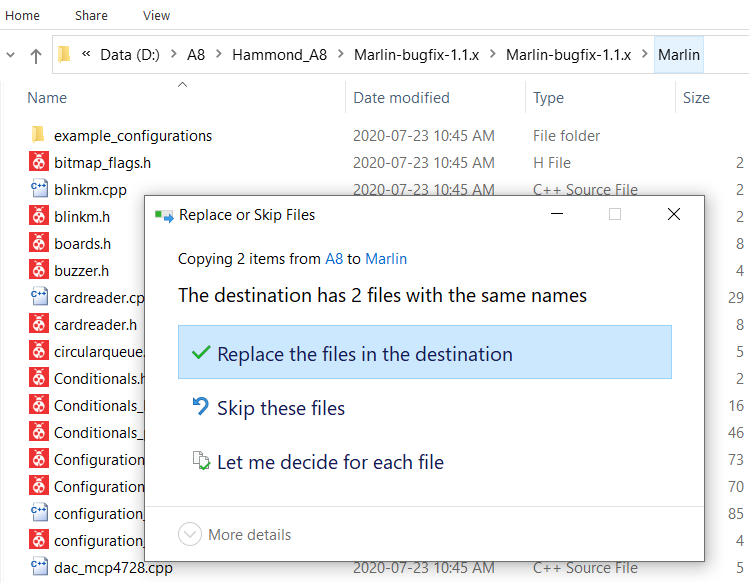
Then paste these into the Marlin main directory, overwriting the previous two configuration files.
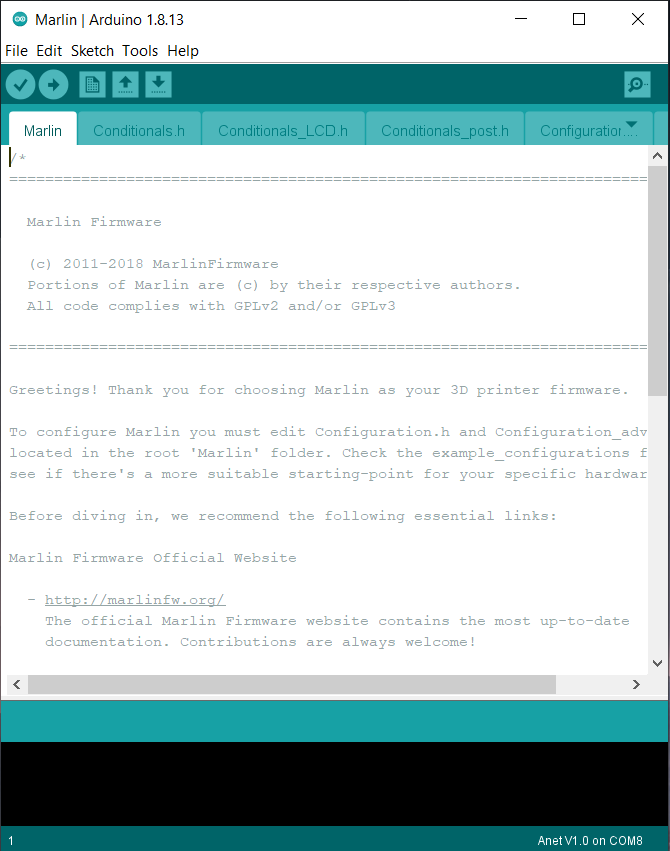
Now open an Arduino window and load the Marlin.ino project.
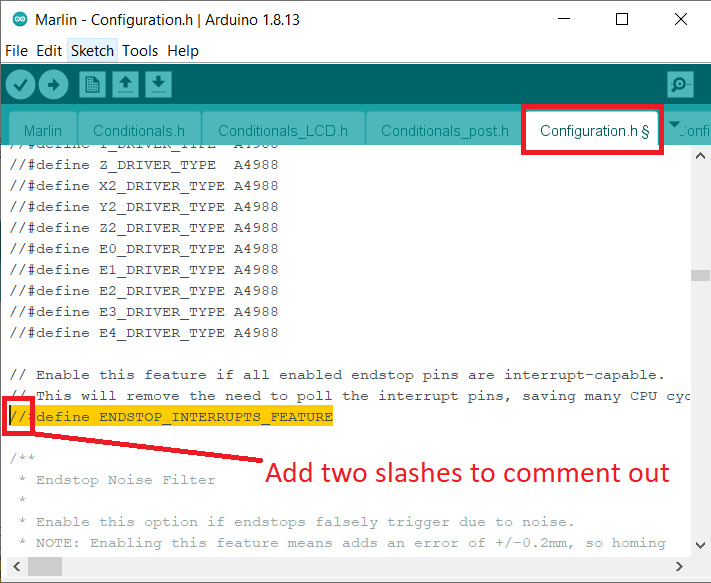
There’s one line we need to change in the Anet A8 configuration. Go to configuration.h and scroll to find #define ENDSTOP_INTERRUPTS_FEATURE. You’re going to comment this out, like so:
Configuring Arduino
Great. Now we need to install the Anet board definition into the Arduino software itself. In the main Arduino window go into File > Preferences and copy https://github.com/benlye/anet-board/raw/master/package_anet_board_index.json into the Additional Boards Manager URLs field. This will tell the Arduino software where to get the definition for the board.

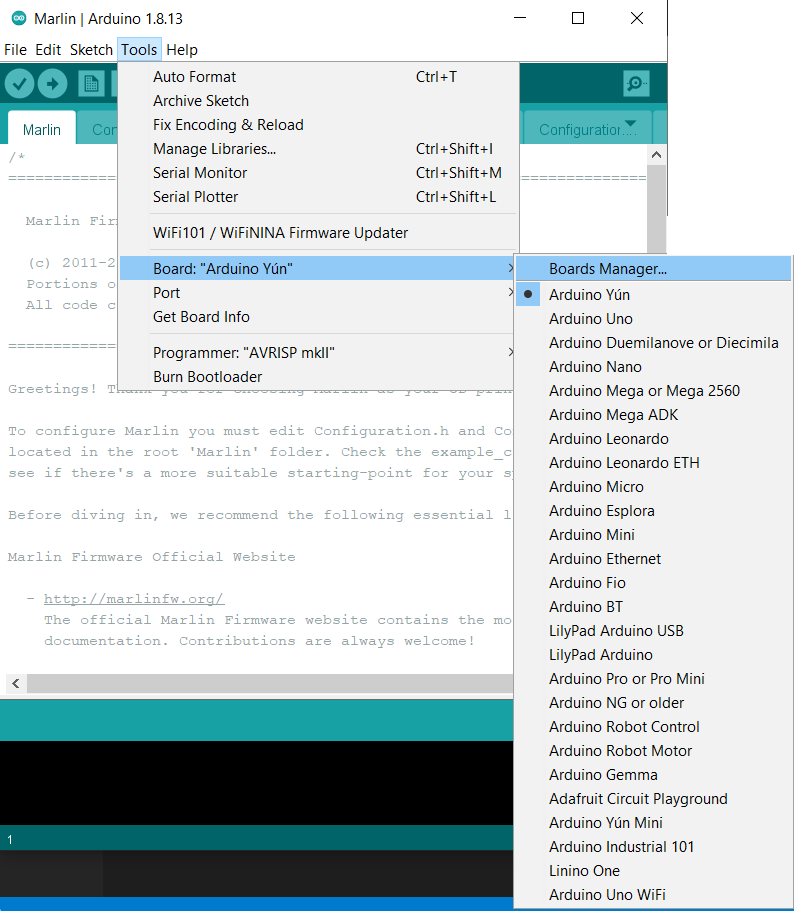
Now we need to install this definition. Go to Tools > Board ... > Boards Manager.
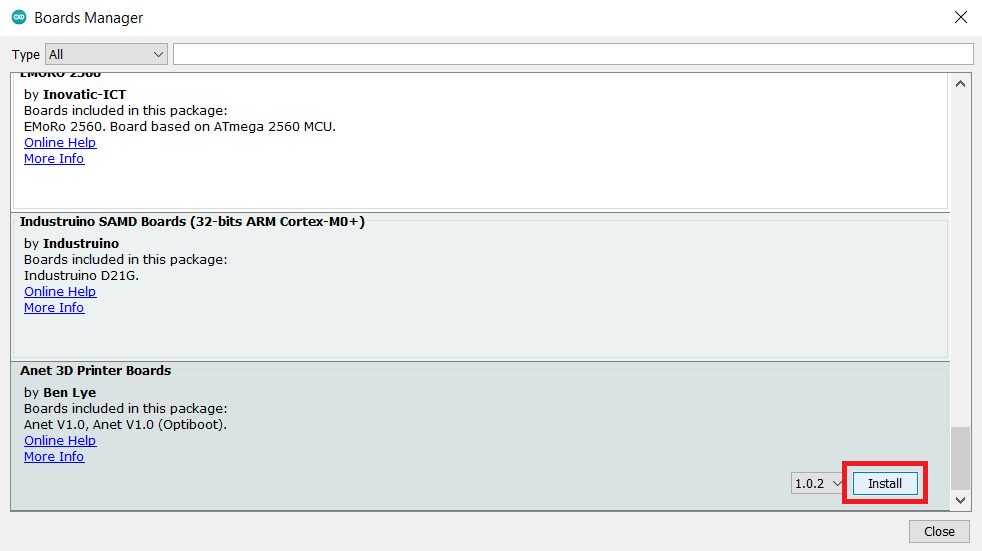
Then, scroll till you see Anet A8 and press Install.
Find the port
Now you’re almost ready to program! If you don’t yet know the port of the printer, on Windows you can use Device Manager. Open Device Manager and plug in the USB cable from the printer to the computer (I find it’s best to have the printer powered first). You should see a device appear under COM ports.
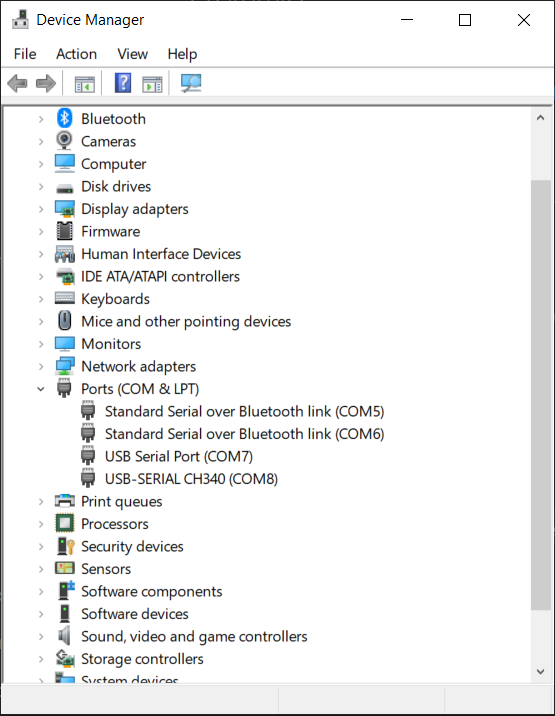
For me it’s the USB-SERIAL CH340 (COM8), so that is therefore my COM port.
In the Arduino main window I now set my port to COM8.
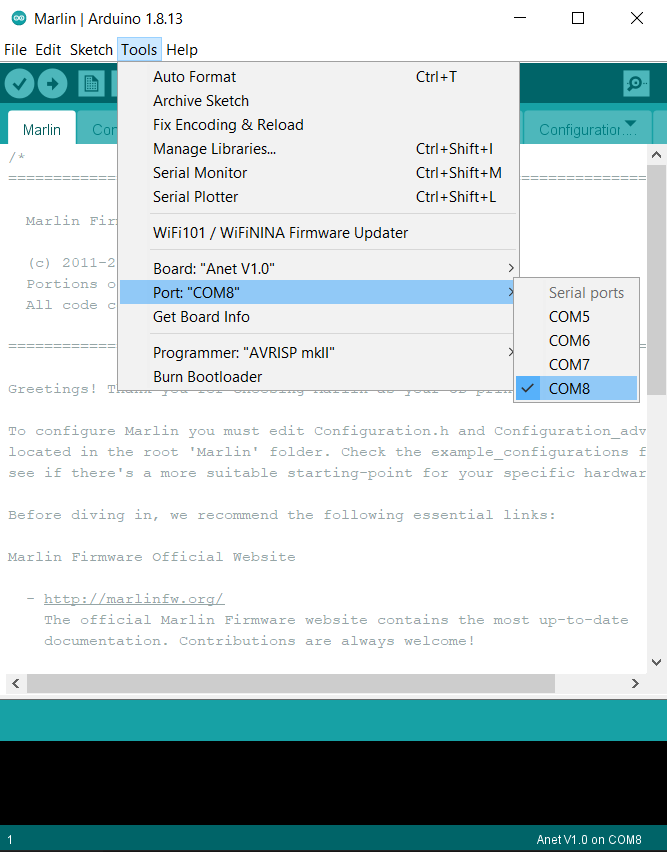
You’re ready to upload the firmware!
Uploading the Firmware
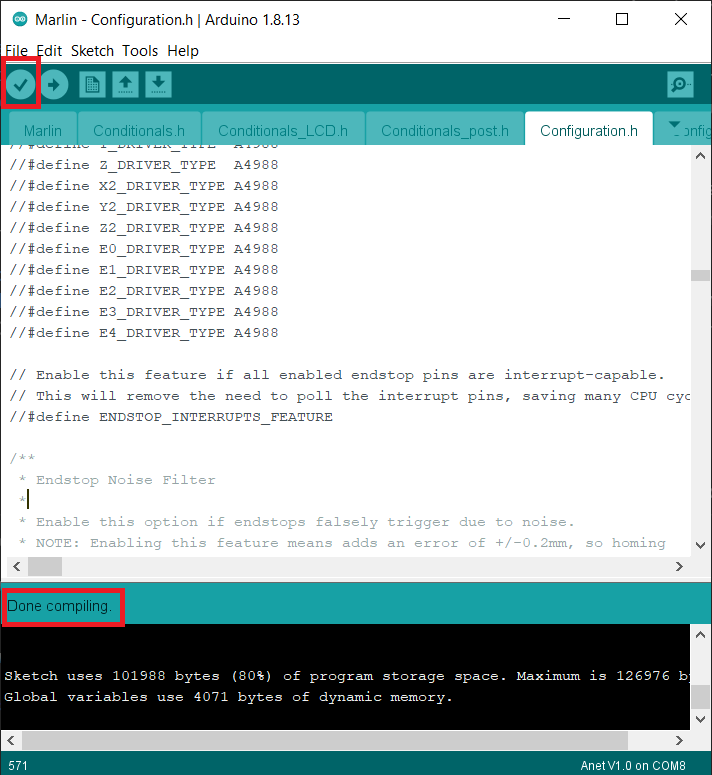
First you want to make sure the firmware compiles first. Press the ‘Verify’ button in Arduino and make sure that this completes successfully. If not, go back to the Marlin steps from earlier and make sure you completed them correctly!
Once that completes successfully, it’s time to do the upload! Take a deep breath and press the Upload button.

It will take a little while…

All going well, it will soon complete and then your printer should reboot (If not, reboot it yourself by unplugging and replugging everything). If it doesn’t work, make sure you have the Arduino bootloader onboard (there’ll probably be a warning message telling you if there isn’t, I was fine). If you have no bootloader, proceed to the postscript of this blog.
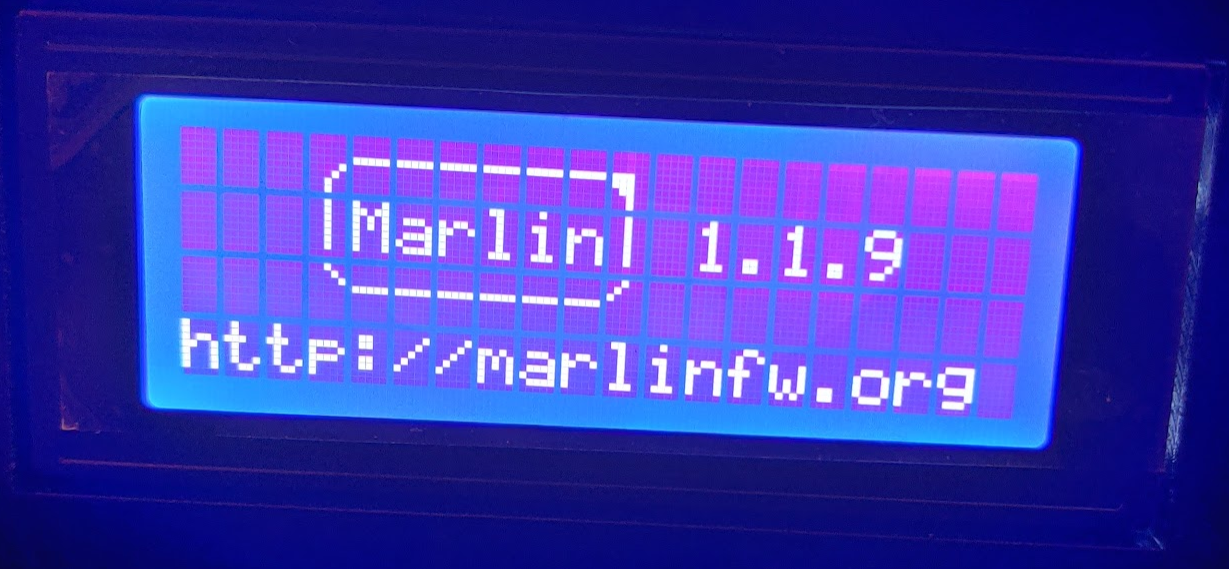
If it worked like it did for me, awesome! Behold your Marlin-powered Anet A8!
BEFORE YOU PRINT ANYTHING
Before you print anything there’s a little recalibration you need to do. I had to adjust the physical Z-heights of my printer head as the original firmware went to the endstop and then went up a bit before printing, whereas Marlin goes to the endstops and then stays there before printing. Just do the steps as you’ve calibrated before - using the keypad etc.
Also, there’s some mutterings in some of the other tutorials online about recalibrating your printer PID heater temperatures. Actually I found the defaults worked very well with my Anet A8 and so did not need to change them from what is specified in the configuration files. YMMV.
Good luck and I hope you enjoyed this walkthrough!
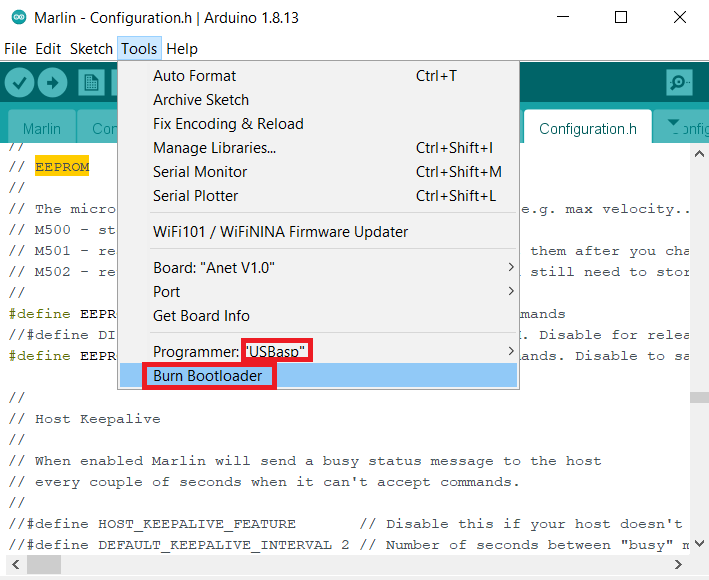
P.S. If your printer lacks the Arduino bootloader
Apparently some Anet A8’s don’t have the Arduino bootloader on them and so the upload fails.
You can fix this using the Usbasp. Connect it up as detailed earlier in this document, and then from within Arduino choose Programmer > Usbasp and then select Burn bootloader. Good luck!