A few days ago the Raspberry Pi foundation made the surprise announcement that they’d had their own silicon produced in the form of a dual-core ARM Cortex M0+ microcontroller. I say “surprising” for a number of reasons: (1) until now, Raspberry Pi have focused on their eponymous single-board computer series, (2) the chip has some interesting and unusual hardware (no on-chip flash paired with an exuberant amount of SRAM and a strange new I/O peripheral they call “Programmable I/O”, and (3) the first dev board they’d produced was actually available in heaps of different websites all at once on day 1!
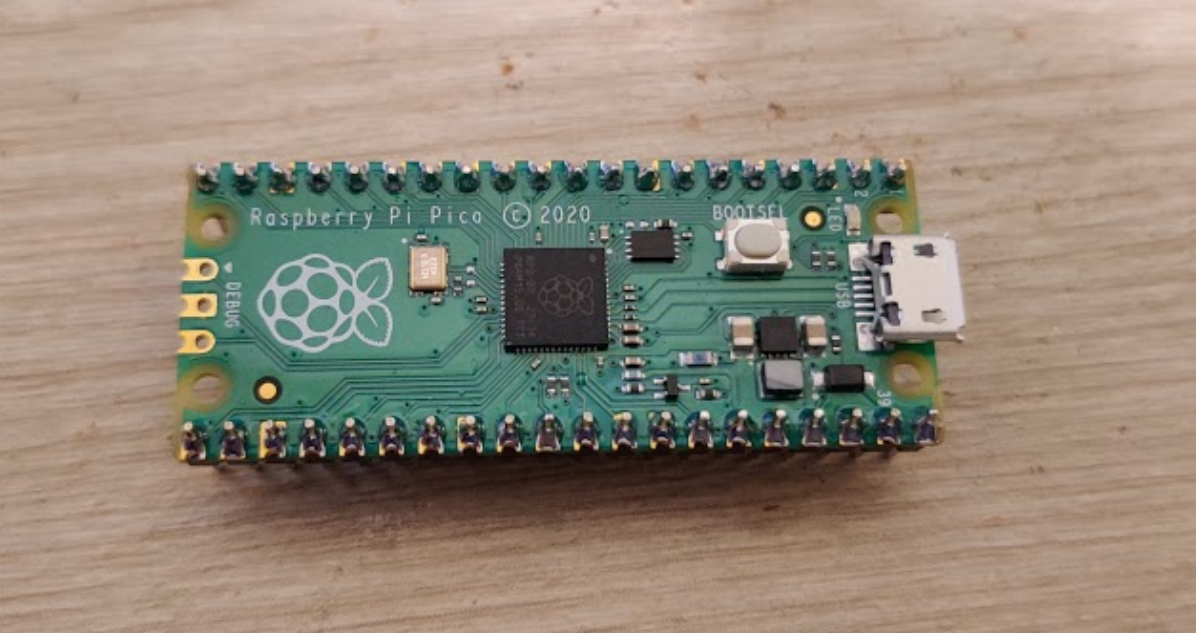
I bought a couple immediately - the $4 pricetag for a USB-ready dev board is pretty competitive in this space.
Hey, is this blog post an advertisment?
I wish! Sadly, it is not. I was not paid to produce this content, nor was I given anything free. Sad!
Also, while I could post an Amazon affiliate link for purchase I won’t, since the current Amazon listings are nearly double the prices available on other websites. Shop around!
Moving on
Before the boards arrived, I started looking up the documentation, and I was again pleasantly surprised. The chip (RP2040) and the dev kit have got some extremely high quality accompanying datasheets and tutorials. You can check it all out on their Getting started page, which might provide the best welcome experience to a microcontroller dev board I’ve ever had.
That said, I did have one apprehension: I am very much a C programmer (just check out the rest of this blog) and the board seemed to be a little more geared towards MicroPython rather than C. While you can program/flash the board via the on-board USB connector, it connects only to a very simple bootloader that doesn’t provide any debug facilities (compared to say an STM32 Nucleo, which has a whole separate programmer on the development boards so that you can program+debug all with the one cable).
If you want a more normal download/debugging experience, the pins are there but the official guide is to use a Raspberry Pi as a programmer and it looks a little involved. I decided to instead put the whole C SDK aside for now (I’ll save up my experience for a second blog post) and instead just try out the MicroPython side of things. I figured this was a nice “pure” experience anyway, as I’ve literally never used MicroPython before.
Since the instructions are so detailed, I’ll only provide a summary of what I had to do here.
- Download the compiled MicroPython
uf2program. - Connect the Pico to the computer (this felt weird since there’s no power LED on the board, there’s no immediate feedback until the computer says a mass storage device is ready).
- Copy over the program as if it was a normal USB drive.
- The Pico rebooted, and, uh, that’s it?
Yep, it really was as easy as that. I fired up PuTTY and pointed it at the new COM port and there it was!
Blink an LED?
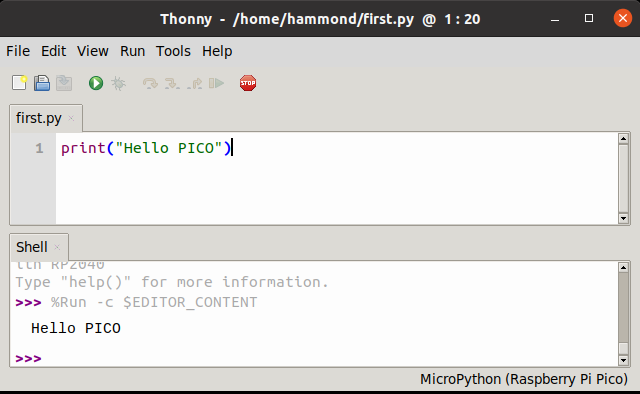
Time to try something out, so I typed in a wee program from the guide:
Blink an LED, from here
from machine import Pin, Timer

led = Pin(25, Pin.OUT)
tim = Timer()
def tick(timer):
    global led
    led.toggle()

tim.init(freq=2.5, mode=Timer.PERIODIC, callback=tick)
And there we have it!
Well, that was easy!
Thonny and blinkenlights?
At this point I decided two things. (1) I wanted to use more than just the on-board LED, and (2) I didn’t want to have to type everything into PuTTY. The guide recommends either using vscode with a bunch of plugins, or Thonny. I hadn’t heard of Thonny before so I decided to try it out.
It seems that Thonny is a neat little IDE for Python and MicroPython, with ‘little’ being the operative word. It reminds me a lot of the Arduino IDE. Installing was easy (sudo pip3 install thonny).
Here’s what it looks like:
Thonny does a little wizardry in the background such that it can run your program on the board for you. You can even save your code to the Pico’s flash memory - assuming I am understanding the documentation correctly, MicroPython partitions the flash memory such that only some of it is used for the interpreter, and the rest is made available for your python codes.
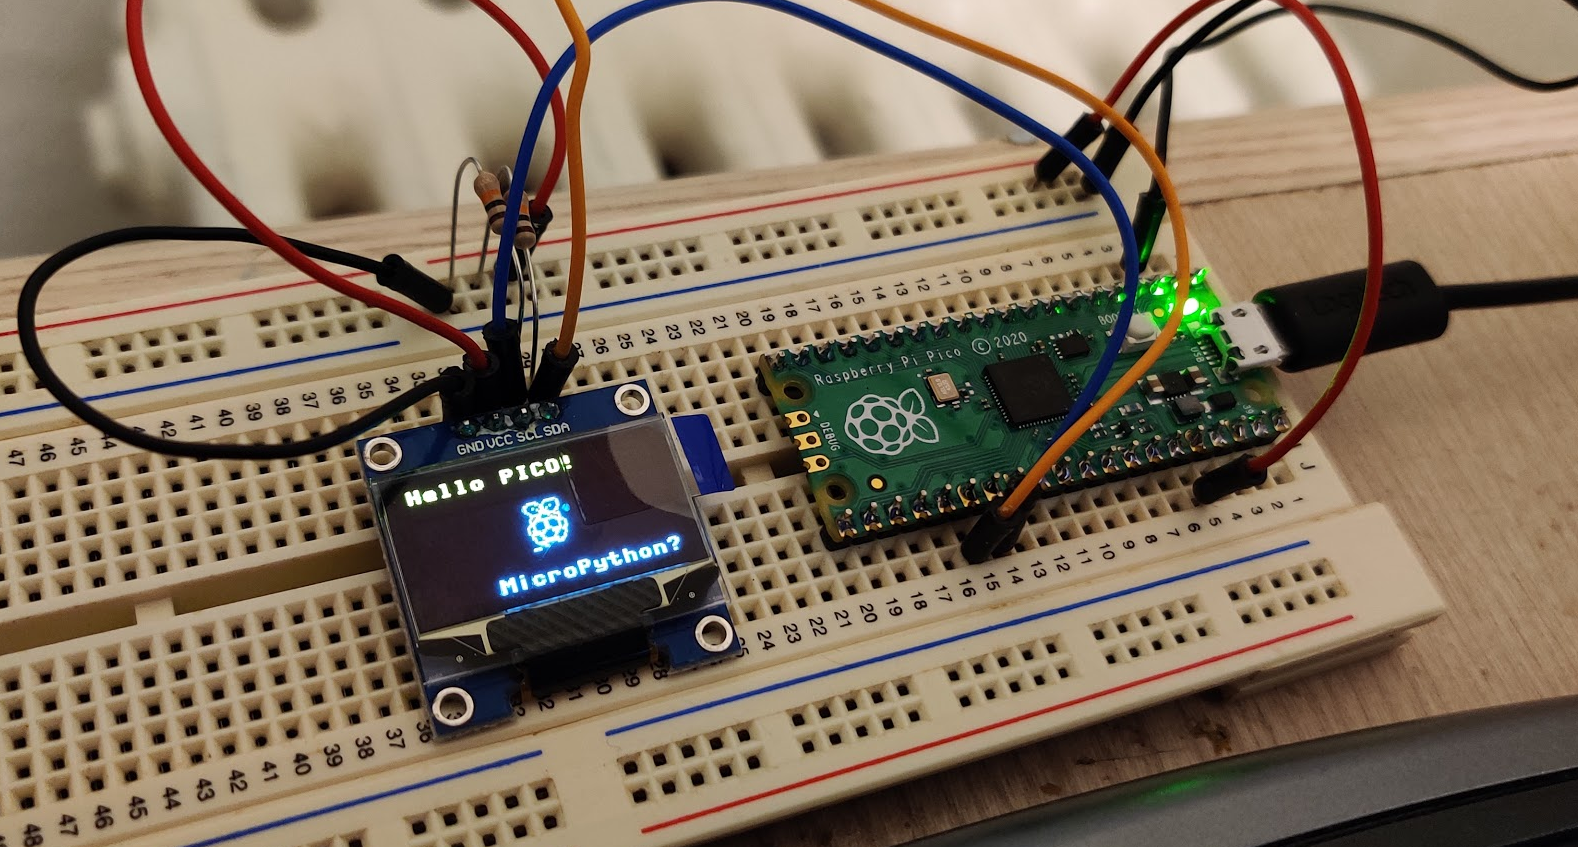
At this point, I soldered on some pins so the board could be easily bread-boarded, and put together some blinkenlights:
If you save the file as main.py to the Pico, it will boot automatically on power up. Neat!
Something more taxing
For my last test (for now), I decided to try using slightly more of MicroPython. The MicroPython Pico manual includes a section at the end for an SSD1306 OLED module, of which I have one lying about! To summarise the instructions:
- Create an ssd1306.py file with the driver code and save it to the Pico.
import SSD1306_I2C- …?
- Profit
Chopped and changed, original here
from machine import Pin, Timer, I2C
from ssd1306 import SSD1306_I2C
import framebuf

# the rpi logo
buffer=bytearray(b"\x00\x00\x00\x00\x00\x00\x00\x00\x00\x00\x00\x00\x00|?\x00\x01\x86@\x80\x01\x01\x80\x80\x01\x11\x88\x80\x01\x05\xa0\x80\x00\x83\xc1\x00\x00C\xe3\x00\x00~\xfc\x00\x00L'\x00\x00\x9c\x11\x00\x00\xbf\xfd\x00\x00\xe1\x87\x00\x01\xc1\x83\x80\x02A\x82@\x02A\x82@\x02\xc1\xc2@\x02\xf6>\xc0\x01\xfc=\x80\x01\x18\x18\x80\x01\x88\x10\x80\x00\x8c!\x00\x00\x87\xf1\x00\x00\x7f\xf6\x00\x008\x1c\x00\x00\x0c\x00\x00\x03\xc0\x00\x00\x00\x00\x00\x00\x00\x00\x00\x00\x00\x00\x00")

# init screen
i2c = I2C(0, scl=Pin(21), sda=Pin(20), freq=100000)
oled = SSD1306_I2C(128, 64, i2c)

# copy over logo
fb = framebuf.FrameBuffer(buffer, 32, 32, framebuf.MONO_HLSB)
oled.fill(0)
oled.blit(fb, 48, 16)

# write some text
oled.text('Hello PICO!', 0, 0)
oled.text('MicroPython?', 32, 56)
oled.show()

# blink LED, we're done
led = Pin(25, Pin.OUT)

tim = Timer()
def tick(timer):
    led.toggle()

tim.init(freq=2.5, mode=Timer.PERIODIC, callback=tick)
print("Hello PICO!")
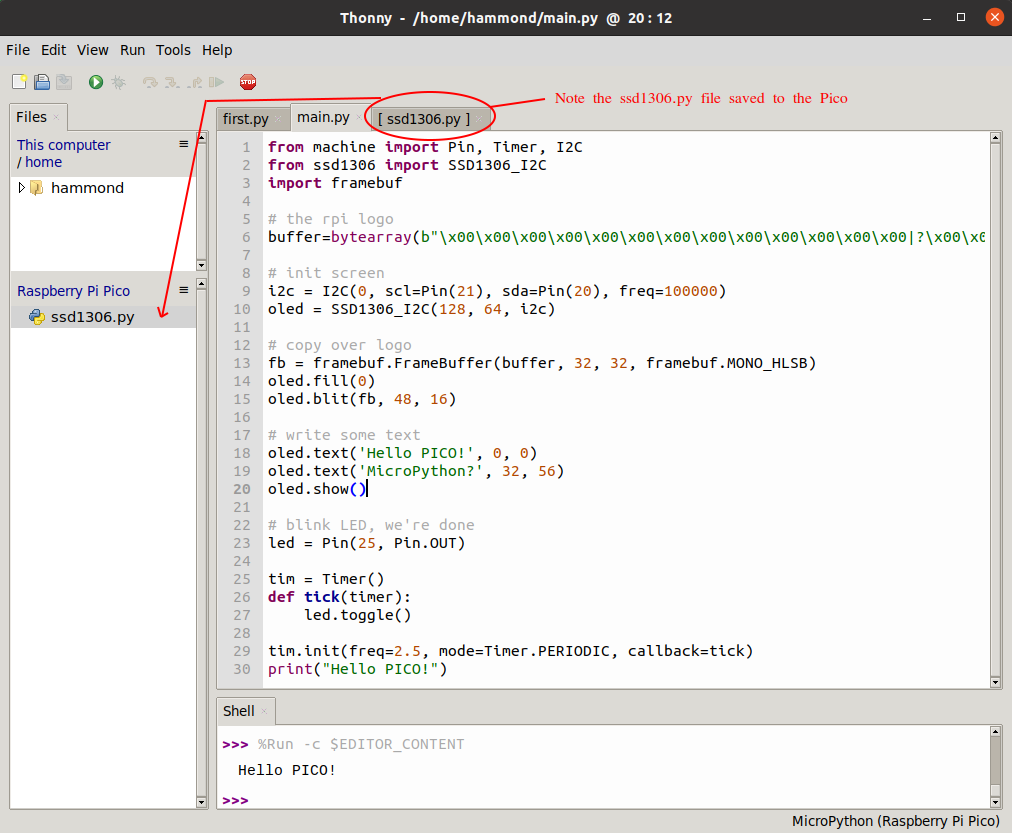
And the output:
Final remarks (for now)
I honestly did not expect this board - and MicroPython - to be such a breath of fresh air. It was actually joyful to play with, a feeling I haven’t truly felt since I first tried out an Arduino, a long time ago (I had been coming from programming in PIC assembly with a socket programmer). I might be getting ahead of myself but the Raspberry Pi Pico honestly feels like the next evolutionary step for hobbyist microcontroller programming. The quality of documentation and examples are outstanding, and every step that I followed worked, which isn’t something I get to say every day. I am very interested to see where the Raspberry Pi Foundatation take this in future.
In my next blog post, I’ll talk about using the PIO, and I’ll also have a go at getting the C setup running. We’ll see if I stay so positive - the steps look quite fiddly compared to the Python ones, but I remain optimistic!